

Why Window and Door Drafts Deserve Attention
Air leaks around windows and doors are among the most common - and most overlooked - sources of energy loss in American homes. Even gaps that seem minor allow conditioned air to escape and outdoor air to infiltrate, putting more demand on your heating and cooling system year-round. The cost of ignoring small maintenance tasks tends to compound: a hairline crack in caulk today can become a rotted sill in a few seasons if moisture follows the air.
Beyond energy efficiency, drafts affect comfort directly. Cold floors near exterior doors, condensation on window glass, and rooms that never seem to reach the right temperature are often symptoms of inadequate sealing rather than a failing HVAC system. Addressing drafts is also one component of a broader weatherization strategy - see sealing air leaks that drive up energy bills for a wider look at where air escapes throughout a home.
The good news: most window and door draft repairs fall squarely in DIY territory. They require no specialized skills, cost relatively little in materials, and can be completed in an afternoon.
What you will need
Tools and Materials You'll Need
Gathering the right supplies before you start saves multiple trips to the hardware store. The materials below cover the most common repair scenarios - a stationary gap in a window frame and a worn seal on an exterior door.
Incense stick or thin candle
Used to detect air movement by observing smoke or flame flicker near window and door edges.
Flashlight
Helps spot visible gaps and deteriorated sealant along frames, especially in dim corners.
Utility knife or putty knife
Used to remove old, cracked caulk and trim weatherstripping to length.
Caulk gun and exterior-grade caulk
Applies a flexible, airtight seal to stationary gaps around window and door frames.
Foam or V-strip weatherstripping
Fills the gap between a moving door or window sash and its frame to stop air infiltration.
Door sweep
Attaches to the bottom of exterior doors to seal the gap between the door and threshold.
Painter's tape
Masks surfaces on either side of a caulk bead for a clean, straight finish.
Avoid Blocking Required Ventilation
While sealing drafts saves energy, some openings - such as combustion air vents for furnaces or dryer exhaust outlets - must remain unobstructed. Sealing these by mistake can create carbon monoxide hazards or appliance failures. If you are unsure whether an opening is a vent, consult the appliance manual or a qualified HVAC technician before sealing it.
Step-by-Step: Find and Fix Your Drafts
Work through these steps in order. Detection comes before repair - don't skip the inspection phase, because applying caulk to the wrong spot wastes materials and leaves the real leak untouched.
Walk the perimeter and note problem areas
Before buying materials, survey every exterior door and window in your home. On a cold or windy day, hold your hand a few inches from each frame edge and corner. Then slowly move a lit incense stick or thin candle along the same path - watch for the smoke to waver or the flame to bend. Mark suspected leaks with a small piece of painter's tape so you can return to each one during repair.
Assess the type and cause of each gap
Not all gaps are the same, and the right fix depends on what caused them. Common sources include dried-out or cracked caulk around fixed frames, worn or compressed weatherstripping on door edges, and settled foundations that have shifted a frame slightly out of square. Look closely: if the gap moves when you open or close the door, weatherstripping is the solution. If the gap is in a corner or along a stationary frame, caulk is appropriate.
Remove old, failing sealant
Applying new caulk over cracked old caulk rarely lasts. Use a utility knife or putty knife to cut and peel away degraded caulk from window frames. For weatherstripping, peel it away from the door stop (the thin strip of wood the door closes against) and clean off any adhesive residue with rubbing alcohol or a citrus-based adhesive remover. Starting with a clean surface is the single most important factor in how long your repair holds.
Apply caulk to stationary gaps
Load an exterior-grade, paintable caulk into a caulk gun. Cut the nozzle at a 45-degree angle to match the width of the gap - smaller is better; you can always add more. Hold the gun at a consistent angle and move it steadily along the gap in one smooth pass. After applying, wet your fingertip or use a plastic caulk tool to press and smooth the bead into the gap. Remove painter's tape (if used) while the caulk is still wet. Allow to cure fully before painting or exposing to rain - check the product label for cure time.
Install weatherstripping on doors and operable windows
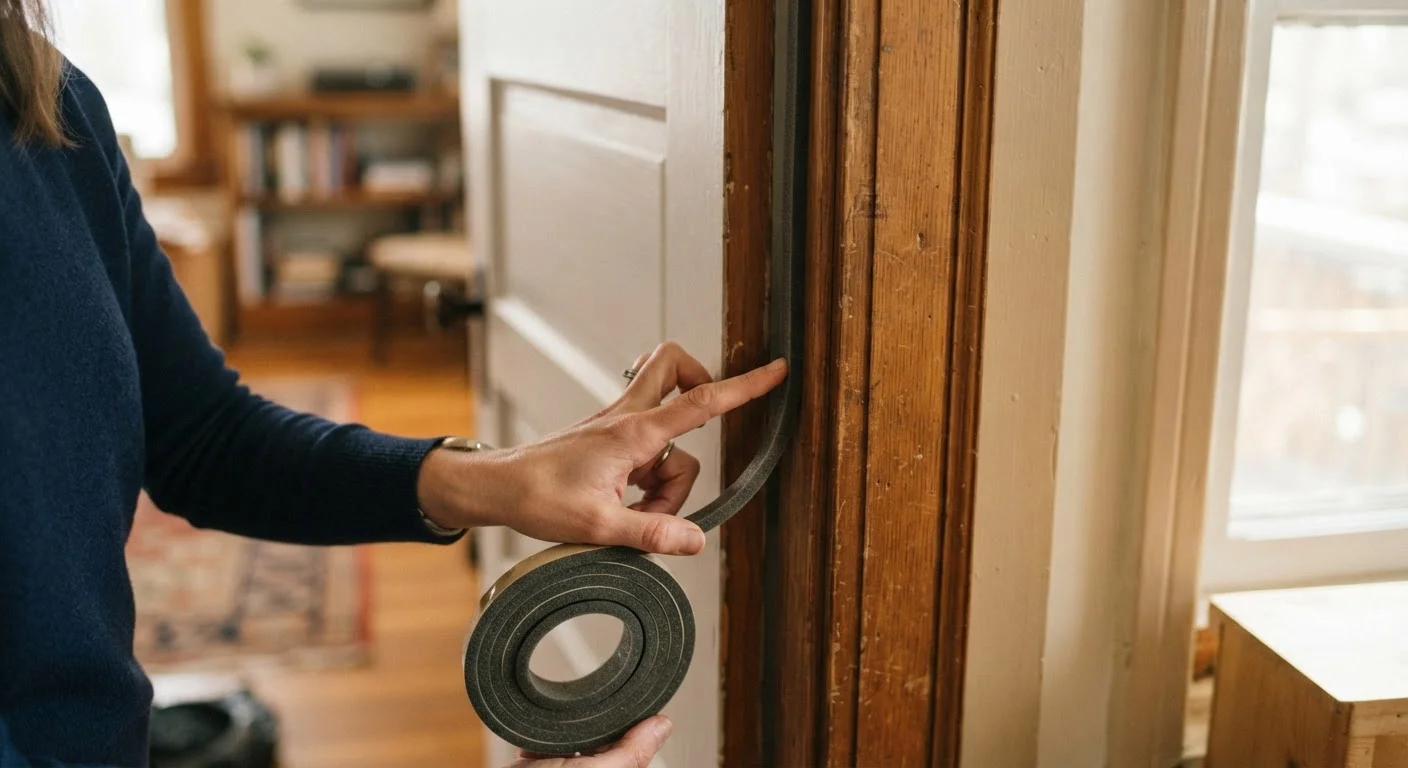
Measure the full perimeter of the door or window sash before cutting. Self-adhesive foam tape is the easiest option for low-traffic windows; V-strip (tension seal) weatherstripping is more durable for frequently used doors. Press foam tape firmly against the door stop so the door compresses it slightly when closed. For V-strip, fold it so the open side of the V faces outward, and nail or press it into the channel on the door frame. Test the door or window after installation - you should feel light resistance when closing but still be able to latch it fully.
Re-test and verify the fix
Once all repairs have cured, repeat the incense or candle test on every spot you addressed. There should be no smoke movement near sealed areas. On a cold night, hold your hand near previously drafty zones - you should feel no cool air. If a spot still leaks, add a second pass of caulk or check that weatherstripping is seated firmly against the frame without gaps at corners.
Inspect After Major Temperature Swings
Extreme heat or cold causes building materials to expand and contract, which can open new gaps or dislodge existing weatherstripping. Plan a quick walk-around inspection each fall and spring to catch any new problem areas before they drive up your energy bills.
Keeping Drafts From Coming Back
Sealing drafts is not a one-time fix. Building materials expand and contract with temperature changes, door and window hardware wears over time, and settling foundations can gradually shift frames. Build a brief inspection into your seasonal home maintenance routine - a quick walk-around each fall is particularly valuable before heating season begins. For a comprehensive pre-winter checklist, getting your house ready before winter arrives covers insulation, plumbing, and heating checks alongside window and door sealing.
Pairing draft control with proper insulation extends the benefit further. Understanding insulation types and R-values helps you see how sealing and insulating work together to keep conditioned air where it belongs. Together, these habits form the core of preventive home care - the kind that avoids expensive surprises rather than reacting to them.
Don't Skip Permits for Structural Work
Sealing drafts with caulk and weatherstripping is straightforward DIY work. However, if you discover rotting frames, failing window seals, or gaps caused by structural movement, those issues may require a licensed contractor and possibly a building permit. Always verify local requirements before undertaking repairs that go beyond surface sealing.
The content on this site is for informational purposes only and is not a substitute for professional advice. Always consult a qualified professional for guidance specific to your situation.